How To Prepare Your Garage For Winter
How to Prepare Your Garage for Winter
The shift from fall to winter signifies a range of tasks to prepare for the cold, snow and ice: cleaning gutters, prepping vehicles, winterizing the lawn, the list goes on and on. The garage is another important task to add to that winter prep list. A few simple changes make your garage warmer and protect it from moisture damage throughout the winter months. They take some effort, but these garage winterization tasks make a big difference when the snowflakes start to fly.
Why You Should Winterize Your Garage
Before we get into the ways to prep your garage for winter, let’s talk about why you should bother. Your to-do list is probably already long, but don’t skip out on garage winterization, even if winter is already here. The tasks give you plenty in return, both in the garage itself and inside your home.
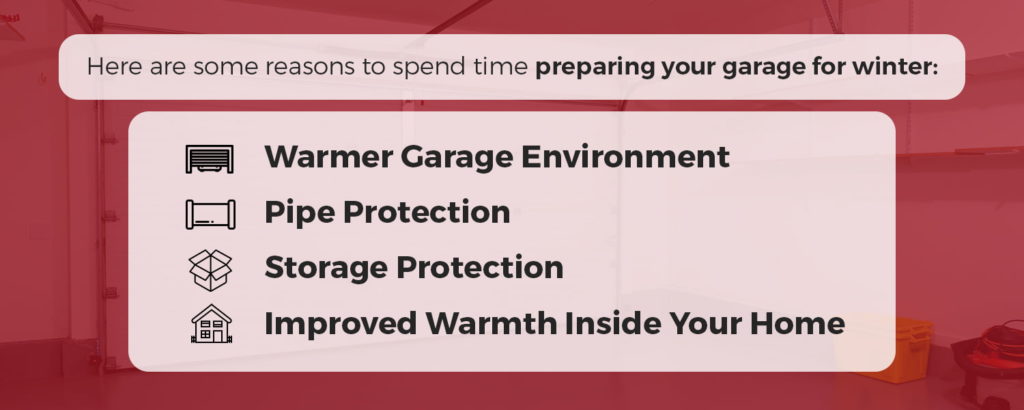
Here are some reasons you should spend time preparing your garage for winter:
- Warmer Garage Environment: If you spend any time in your garage during the winter, you’ll appreciate the slightly warmer environment when you do some winterization. Even walking to your car is more pleasant when your garage is insulated and winterized. Speaking of your vehicle, a warmer garage means a warmer car, so you won’t freeze when you have to head out this winter, and the inside of your car warms up much faster.
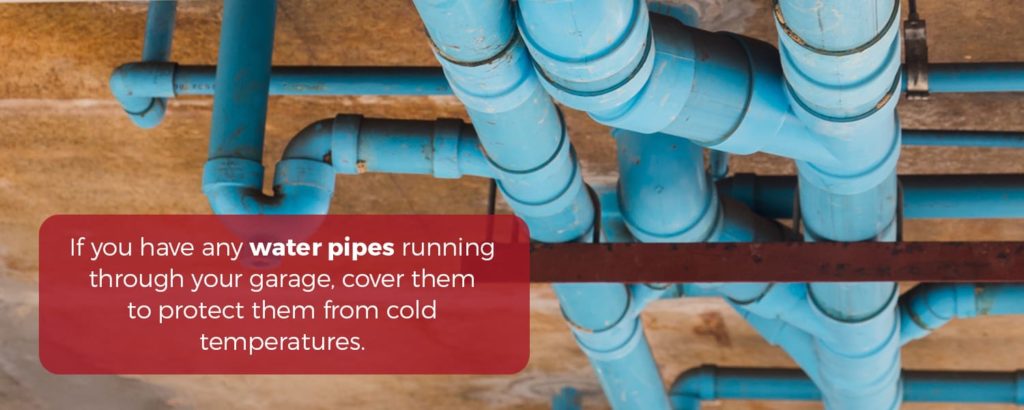
- Pipe Protection: Do you have any water pipes running through your garage? If so, keeping your garage warm is essential to prevent burst pipes. Protecting those pipes averts serious damage to your plumbing system, which saves you time, stress and money.
- Storage Protection: The garage tends to serve as storage in many homes. Winterizing your garage protects those items from extreme cold. Some of the winterization methods help keep moisture out of the garage, which prevents moisture damage to items near the floor.
- Improved Warmth Inside Your Home: A warmer garage will help your home’s interior stay warmer. This is especially true in rooms that share a wall with an attached garage. The cold air from a freezing garage seeps through the walls, making your home feel colder. This means you have to crank up the heat to stay comfortable.
Inspect Your Door
Perform a thorough inspection of your garage door before you start making repairs or changes. Look at the door with it open and closed. Watch as it opens and closes to identify any potential problems. If you notice anything out of the ordinary, call our garage door professionals to fix the problem before winter hits. Letting our professionals tackle those garage door repairs before the snow will save you from many problems down the road.
If the door seems to operate well with the opener, test the door by opening it manually. This ensures the door slides smoothly and there are no obstructions on the tracks. It also checks for problems with the springs. To test the door manually, simply pull the emergency cord that hangs down in the garage. This detaches the door from the opener temporarily, allowing you to slide the door up and down on your own.

When in manual, does it open easily without a lot of effort? That’s good news for your springs, which are working just fine. If you have a difficult time sliding the garage door open manually, there may be a problem somewhere in the system. Contact our professional garage door service team to investigate the problem.
Look at the door from the inside of the garage while it is closed. Can you see daylight in certain areas? If the light can flow easily through cracks in the door, so can the cold air. These are areas to focus on when sealing, insulating and repairing the door. Closing up all those gaps can make your garage a lot warmer and prevent snow from blowing inside this winter.
Once you’ve finished your garage door inspection, test out your keypad and garage door openers as well. If they’re slow to respond or don’t work consistently, they may need a fresh set of batteries. Change them now so you’re not stuck outside this winter when the batteries die. It’s also a good idea to keep a spare set of batteries handy.
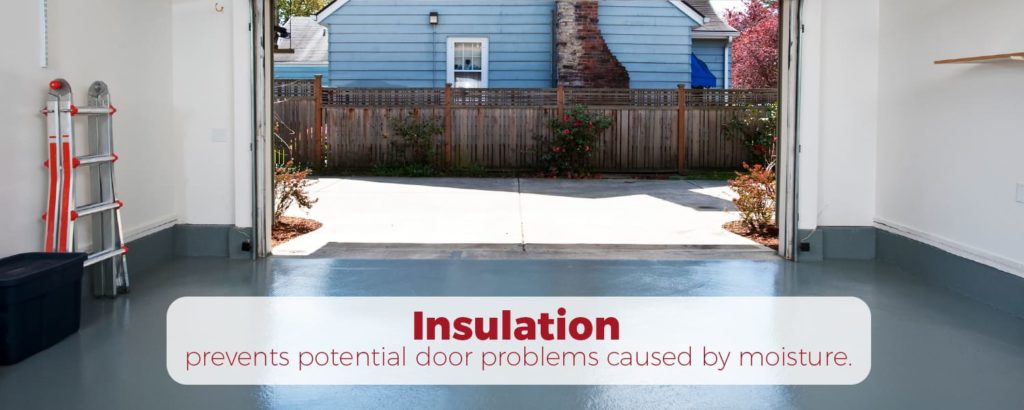
Add Garage Door Insulation
The garage door takes up a large portion of your garage’s exterior wall, so the door is a major source of cold air entering your garage. If your garage door doesn’t have insulation, adding a layer can make a big difference in the temperature inside your garage. Insulation also prevents potential door problems caused by moisture. On an uninsulated garage door, moisture can build up and freeze into ice. Over time, that buildup makes the door heavy, sometimes to the point, it can no longer open. Our professional team can quickly diagnose similar situations and help you insulate to prevent further issues.
Garage door insulation kits are available with a variety of insulation types. You can also insulate your garage door on your own by using rigid foam board panels. The type of foam board insulation generally has an R-value of three to six. Since a higher R-value means greater insulation, using two layers of the foam board insulation helps you get even more bang for your buck. Cut the panels to size to fit perfectly in the recesses of your garage door.
Keep in mind that any time you add insulation to an existing garage door, you also add weight. It might not seem like much, but insulation can add upwards of 20 pounds in certain situations. That excess weight can wreak havoc on your garage door’s operation. Let our professional team help you choose the correct IPPT based on the weight of your door. We can also let you know if you need to replace any parts, such as the springs, to accommodate the additional weight.
If your garage door is old and doesn’t work well overall, consider replacing it with a newer model that has built-in insulation. It’s better to leave garage door installation to our professionals, as the task is difficult, requires precision and is potentially dangerous. Our professional crew can install a new garage door in a few hours, and you don’t have to do any heavy lifting. Moreover, we’ll get rid of the old door for you.
Insulate the Walls
If your garage walls don’t have any insulation in them, now is the time to add it. Just as cold air can come right through an uninsulated door, the same idea applies to uninsulated exterior walls. The cold transfers right through into your garage, dropping the temperature.
Before you add insulation to garage walls, look for any cracks or gaps in them. Inspect the areas around windows to find gaps or leaks. If the temperature is already dropping or you inspect on a windy day, you can likely feel drafts from these areas. Patch up any cracks first to make your insulation more effective. Replace any cracked or damaged windows for additional protection from drafts.

Insulate any exterior garage walls first to minimize cold seepage into the space. Insulating interior walls is also beneficial, as it can keep colder garage air from making interior rooms cold.
While you’re insulating, consider sealing around any outlets, switches and fixtures. Cold air can get into your garage through these areas when not properly sealed.
Replace the Weather Stripping
The weather stripping around your garage door is essential in keeping cold air and weather elements outside. Inspect the weather stripping all the way around the door. Some stretches may be fine, while others may have damage. If you see any damage, replace all of the weather stripping for consistent protection and a consistent look.You should replace any cheap, flimsy weather stripping as well. Using a higher quality weather stripping system makes it more effective in keeping cold temperatures and moisture out of the garage.
What should you look for when inspecting the weather stripping? Check for these potential problems:
- Hardened areas due to heat exposure
- Cracks or tears that won’t provide adequate protection
- Missing weather stripping
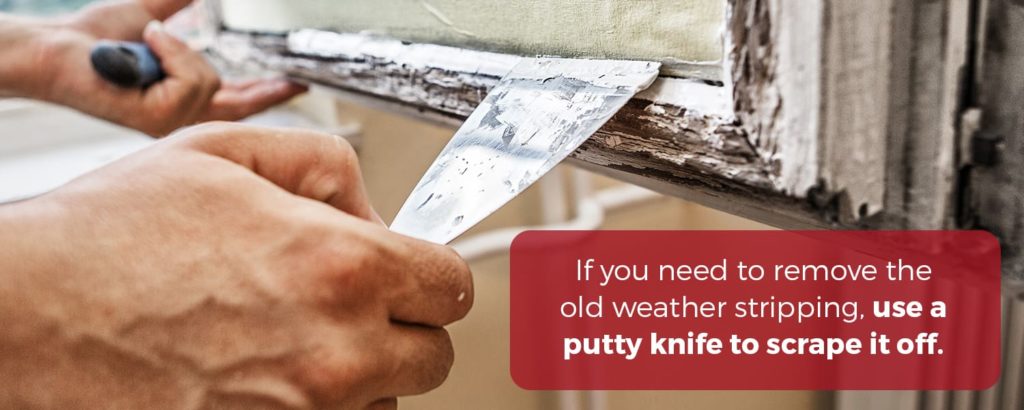
If you need to remove the old weather stripping, use a putty knife to scrape it off. Remove all remnants in order to install the new stripping tightly. Measure and install the new weather stripping with the door closed. This ensures the seal is tight to the door. The rubber flap on the weather stripping should flatten a bit against the door to allow the door to work properly while still getting a tight seal.
The bottom of your garage door should also have weather stripping to get a good seal when the door is closed. Inspect that weather stripping at the same time. If you notice a problem anywhere along that bottom seal, replace the entire length of weather stripping.
Lubricate the Moving Parts
Think about how many times you open and close your garage door in a week. With so many moving parts — many of them metal — adequate lubrication is necessary to keep everything moving smoothly. Lubricating the parts right before winter is any easy way to keep the garage door running well during the cold months. A non-silicone lubricant designed for garage doors is ideal. You may already have WD-40 or LPS 2 in your garage. These are two great examples of penetrating lubricants that will get deep into the parts. Avoid using grease, as this can create stickiness in the tracks and collect debris
Several parts need lubrication, including:
- Springs
- Rollers
- Hinges
It is very important to note that lubrication should not be used on bearings as this will dissipate the greases already inside the bearings.
Lubricating the parts takes a little work, but it is an easy job. Follow these steps:
- Wipe the parts with a clean, dry cloth to remove any dust and previously applied lubricant.
- Apply a lubricant designed for garage doors to all parts except the bearings.
- Wipe off extra lubricant with another clean, dry cloth as you go, so it doesn’t drip all over your garage.
Protect the Garage Floor
It may not keep your garage much warmer, but waterproofing or sealing the floor helps protect the flooring when you start tracking in snow, salt, slush and mud. All that winter debris can damage concrete, cause messes and spread to items stored on the garage floor.
There are many garage floor coverings and sealer options available. Multi-coat epoxy floor systems tend to provide the greatest protection and durability year-round. During the winter, an epoxy-coated garage floor protects against damage from road salt and water. Epoxy also prevents damage during the freezing and thawing cycle. The coating stands up against gas, oil and chemicals, and resists staining so your garage floor looks great long-term.

Epoxy systems do have some drawbacks. They can be difficult to install and can take four days or longer to apply and cure. Multi-coat epoxy flooring is also on the expensive end of garage floor sealing options. Professional application runs about $4 to $5 per square foot, while DIY options cost about $500 to $600 total.
Check out other options if the time, cost or installation process of multi-coat epoxy systems doesn’t meet your needs:
- PolyasparticGarage Floor Systems: This type of floor covering is very similar to epoxy coatings, but the installation only takes about a day, so you’ll regain use of the garage faster. It is on the higher end of the cost scale, at about $6 per square foot. Professionals typically install these flooring systems.
- Epoxy Paint Kit: These epoxy paint kits are much cheaper than the multi-coat epoxy floor systems and are easy to install on your own. These systems often lack in the durability department, though. They typically use only one layer of paint instead of multiple layers, which means they tend to only last a few years at most. Proper installation, low usage and proper cleaning help extend the longevity of the coating.
- Acrylic Sealer: An acrylic sealer is another low-cost option you can apply on our own, but it won’t provide as much protection against the salt and water that enters the garage in the winter.
- Penetrating Garage Floor Sealer: This type of floor covering is another economical choice that is relatively easy to do yourself. These sealers penetrated down into the concrete, forming a barrier without coating the garage floor like other sealers. This type of sealer offers protection against road salt and damage due to freezing and thawing, making it a good choice for winter protection. The sealer typically lasts for years.
- Concrete Densifiers: Concrete densifiers are easy to install by simply mopping or rolling the product over your floor. Rather than seal the floor, a concrete densifier causes a chemical change to the concrete, which makes the surface denser and stronger while filling in any pores. The increased density prevents liquids from seeping down into the concrete.
Cover Pipes
If you have any water pipes running through your garage, cover them to protect them from cold temperatures. You can get foam pipe wrap designed to add insulation to the pipes. The wrap goes on easily and insulates the area.
For pipes that run outside, such as a pipe to an outdoor water spigot, shut off those water lines and empty water from the pipes before winter hits. This prevents freezing in those lines.
If your water heater sits in your garage, give it a cover too. Insulating blankets designed for that purpose are relatively easy to install. Insulation is particularly useful for older water heater models. Newer models typically don’t need the extra insulation.
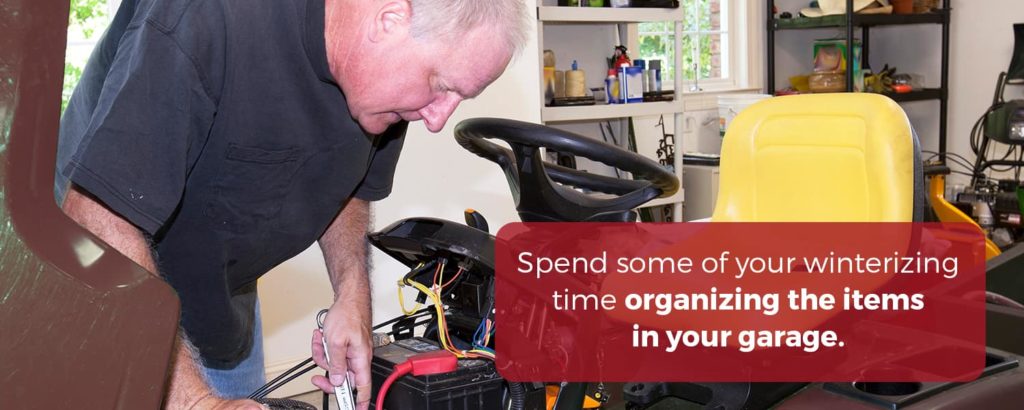
Organize the Garage
Spend some of your winterizing time organizing the items in your garage. You won’t need your lawnmower, gardening tools and other warm-weather supplies for several months. Clean them for the long winter storage to prevent rust and other damage. Run out the gas on all your gas-powered tools, and empty the oil before you pack them away for the winter.
Here are more tips for organizing your garage for the winter:
- Clean out the Old: Prepping for winter is the perfect time to do a little purge in your garage storage. Do you still use the items stored in your garage? Can you find a better home for some items? Can you donate or toss anything to free up more space? Once you clear them out, do a thorough cleaning of the garage by sweeping out any stray fall leaves and other debris to provide a clean canvas.
- Plan Your Storage: Before you start moving or storing things, take a look at the space. Decide where to store different types of items or ways you can reconfigure your current storage system to maximize the space.
- Put Summer Items Away: Summer items should go toward the back of your garage storage areas. You won’t need them for a while, so keeping them up front is not necessary.
- Move Winter Items Forward: Pull out any items you’ll need for the winter months. This might include holiday decorations, shovels, snow blowers and other winter items. Make sure those items are all in working order and ready for the upcoming season. Find a prominent storage spot in the garage where you can easily access those items.
- Elevate Items: If you have items stored directly on the floor, consider elevating them somewhat. This prevents them from getting wet when melted snow or slush enters the garage.
- Utilize Walls: Add wall hooks, track systems or shelves to maximize the wall space in your garage. This keeps items off the floor and keeps everything neat.
- Store Sand or Salt Conveniently: Find a safe yet easily accessible spot for sand or salt. Store the sand or salt in a waterproof container raised off the floor. Make sure you can get to it with or without vehicles parked in the garage.
Check on Ventilation
Ventilation may seem more important in the summer, but it’s also key during the winter months to prevent moisture build-up in the garage. If your garage doesn’t currently have good ventilation, consider adding it. A ventilation fan designed for garage use is one way to achieve the greater air circulation. Ventilation also helps remove dangerous fumes, such as car exhaust, to keep them from entering your home.
Install a Garage Heating Unit
Insulating and preventing cold air from entering the garage help, but these jobs won’t always raise the temperature to a comfortable level. Adding a heater can help you reach those higher temperatures if desired. A garage heater is an investment, but it makes a huge difference in the comfort and environment of the garage. Heating your garage is ideal if you have a workshop area and spend a lot of time there year-round. It also helps if you can’t expose the items you store in the garage to extremely cold temperatures.
When choosing a unit, only choose a heater designed for garage use. These special heaters take into consideration the potential for flammable items in the garage. Garage heaters are available in both electric and gas versions. Both do the job but with some differences.

Gas garage heaters tend to offer better energy efficiency, which can help you save money over time. The installation is more complicated for gas heaters, as you need a gas lined installed, and ventilation is crucial for safe operation.They also tend to cost slightly more initially, with an average cost between $400 and $800 with an additional $150 to $300 if the heater doesn’t come with the ventilation kit.
Electric garage heaters tend to be easier to install and are slightly less expensive, costing about $100 to $400. The primary drawback is the greater amount of energy needed to power the unit, which costs you more in the long run in operating expenses.
When choosing a garage heater, consider the size of the space. Garage heaters come in different sizes, so it’s important to buy one that can adequately heat your garage. Having a garage heater professionally installed is the safest option. This ensures all the connections are correct and proper ventilation is in place.
Do you need help with garage door repairs and service as you begin getting your garage ready for winter weather? Contact Ole and Lena’s to explore all the ways we can help!